Lower front panel alignment

Moderators: theelanman, dapinky, Specky, clemo, Nige, Sy V, Dave Eds, DaveT, Elanlover, muley, Enright, algirdas, nitroman, GeoffSmith

Lower front panel alignment

Postby Jon » Fri 16.02.2024, 01:10

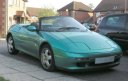
I noticed last week the lower front panel seems to be very slightly lower on the driver's side there is a small gap, noticeable on the left side to the wheel arch and front next to the slot between the headlight and indicator - I'm not sure if this is new, or has been like this for sometime, it isn't particularly easy to spot, but now I've noticed it, I can't unnoticed it.

Does anyone have any ideas where I should be starting to look to try and fix this? I don't really want the front to fall off :wink:

Thanks!!

ElanFront.png
You do not have the required permissions to view the files attached to this post.
User avatar
Jon
Fanatic
 
Posts: 250
Joined: Mon 12.05.2003, 08:54

Re: Lower front panel alignment

Postby Tuga2112 » Fri 16.02.2024, 11:02

yes.

bumper has 8 bolts. plus 2 at the very far edges on the top where they connect to the clam shell.
you just need to re-adjust the bumper... easier said than done. although depending on your skillset and if you find seized bolts in the bumper. is can be a 2 hour job or a weekend ordeal.

i have personally removed 2 bumpers from 2 m100s that had 1 nut seized. so my experience is that for every new car i get, theres a 100% chance one nut will be seized in the bumper, meaning it will shear off and wleding a new stud to the bracket is a must.

obviously... your M100 wasnt sold as a project so.. you may get lucky...
have you checked youtube ? i dont know how much detail i go into when i did the video installing the bumper. but if therers a video from toby you will porbably find all the details you seek there.
Still learning
Youtube Channel @Tuga2112 M100 repair videos
User avatar
Tuga2112
God
 
Posts: 3039
Joined: Fri 12.09.2014, 22:54
Location: Durham with a regular trip to Walsall

Re: Lower front panel alignment

Postby dapinky » Fri 16.02.2024, 11:24

Edit:- Was writing this at the same time Joao was posting his reply, so much is duplicated!

Jon,

Fixing this 'issue' is something which should take about half an hour, but will probably end up as a weekend's worth of work! I say this as a man who has removed and replaced the whole lot on every Elan I've owned.

Basically, the front bumper needs to be adjusted - and this is a "simple" case of releasing some bolts, moving it, and tightening the bolts - except they are 30+ years old, likely to be corroded, and need getting at to start with.

You may get away with 'just' adjusting the small strap-link behind the wheelarch liner (it is a strap of steel bent in a dog-leg shape, attached to the bumper, and attached to the clamshell. It is attached by way of a steel threaded bar bonded to the clamshell, and a couple of 10mm nuts to adjust it's relative height..... They are often easy to get at, once you have removed the wheelarch liner (or peeled back the front half of it), but if the threads are rusted, it is possible to damage the thing with force. So it is important to support the threaded bar when undoing the nuts.

Obviously, shortening the fixing will lift the bumper up a bit towards the clamshell.

However, there are also bolts through the end of the bumper which need to be released first, and then locked into place when the adjustment is done - these go into the fibreglass moulding for the oil cooler and intercooler housings at each end of the bumper.

To do the job fully, you will also need to undo (but not remove) the 4 x M8 fittings behind the centre of the bumper, which are the main mounting points for it - this will allow any movement of the fibreglass bumper to be unstressed as opposed to being left a bit 'twisted' but the earlier adjustment. These 4 nuts/bolts are easy to undo if they are not corroded, but a bit of a bugger if they are!

Page 10.23A in the Parts Manual shows the whole thing, but doesn't really show how awkward some of the bits are to get to.

Basically, the procedure is to undo the 4 central nuts, being careful not to drop any of the adjustment shims (as the position of those appears to be fine as-is), loosen the end of bumper to quarter panel nuts/bolts, remove the wheelarch liner (enough to gain sufficient access to the fixings). Adjust the fixing strap relative length to set the gap as required, tighten up the fixing bolts and refit the arch liner.

As siad, it could be half an hour, or it could be longer - it's all down to ease of removal of old nuts!!!
Dave

Just the one now, but this one's mine! - and it will be finished eventually..... - but also temporary custodian of a project until it is finished enough for Angie to drive it


...oh, and a 2006 Freelander destined for the jungles of The Gambia - 4500 miles across roads, desert and tracks - what could possibly go wrong?
User avatar
dapinky
LEC Administrator
 
Posts: 10605
Joined: Sun 15.10.2006, 12:54
Location: As far west as you can get in West Wales before you become Irish (Pembroke Dock).

Re: Lower front panel alignment

Postby simonbuk » Mon 29.06.2026, 11:59

OK interested in this. I put my front clam on yesterday but whatever i tried i found i had a large gap between the clam and bumper. Went searching and found this thread.

If i've read it right the only adjustment is by the side parts which can be screwed up or down ? The four central bolts at the front simply go horizontally inwards so it can't be raised higher ? It seems like i want to go higher all round, not sure why because it seemed ok before i dismantled it. I'm going to lift off the clam again just to see if i have anything trapped underneath but think it is all ok.
Black S2 No.357
Aqua Blue S2 No.385
Simonthesailor

"Twenty years from now you will be more disappointed by the things that you didn't do than by the ones you did. So buy an Elan" - Mark Twain.
User avatar
simonbuk
God
 
Posts: 1599
Joined: Sun 13.03.2016, 12:50
Location: Mostly Worthing,West Sussex, sometimes the canals.......

Re: Lower front panel alignment

Postby simonbuk » Mon 29.06.2026, 14:48

Well the good answer is that the front bumper is adjustable up/down, left/right as the bolt goes through a hole which is about a centimetre and a half in size.
So i've moved the bumper up which is much better.
The next problem i have is that the front clam seems to be sitting on the crash structure in the center. Probably holding it up a mm or two in the middle - now i can't see of a way around this as i believe they were bonded to the car ?
Lump of wood - hammer ......... ?
Black S2 No.357
Aqua Blue S2 No.385
Simonthesailor

"Twenty years from now you will be more disappointed by the things that you didn't do than by the ones you did. So buy an Elan" - Mark Twain.
User avatar
simonbuk
God
 
Posts: 1599
Joined: Sun 13.03.2016, 12:50
Location: Mostly Worthing,West Sussex, sometimes the canals.......


Return to Hood/Top, Bodywork and Fittings

Who is online

Users browsing this forum: No registered users and 1 guest