
it's time to make the R-Project!
officially started today but, in reality, started before the purchase of the car, reading this forum.
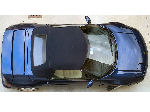
first mod, an Union Jack
| Home | WikiLEC | Repairs | Upgrades | Gallery | Buy & Sell | Mountain Chips | Meets & Events | Contact |
|
R-Project
Moderators: theelanman, dapinky, Specky, clemo, Nige, Sy V, Dave Eds, DaveT, Elanlover, muley, Enright, algirdas, nitroman, GeoffSmith
20 posts
• Page 1 of 1


 by ratman » Mon 22.01.2007, 14:34
ready to fit!!
I really don't know how, at this moment!
I have to put the light iside the bumper, behind the grille.
I don't know if, disassembling the light cluster, I can access from the top or if I can access only from the bottom side of the bumper.
I really don't know how, at this moment!
I have to put the light iside the bumper, behind the grille.
I don't know if, disassembling the light cluster, I can access from the top or if I can access only from the bottom side of the bumper.
- Attachments
-
 05-ready to fit.jpg
- (77.25 KiB) Downloaded 156 times
Lotus Elan S2 n°538
-
ratman - Fanatic
- Posts: 410
- Joined: Mon 12.06.2006, 10:22
- Location: Perugia, Italy
lights on
by ratman » Fri 16.02.2007, 17:34
what do you think about it?? I think that it's time for a new plinth!!
- Attachments
-
- lights on.jpg
- (107.3 KiB) Downloaded 177 times
Lotus Elan S2 n°538
-
ratman - Fanatic
- Posts: 410
- Joined: Mon 12.06.2006, 10:22
- Location: Perugia, Italy


by ratman » Thu 22.03.2007, 09:14
I bought a dump valve but I need a new hard mainfold.
let's do it in carbon fibers using a carbon fibers mould mado on the original one!!
Sometime it's useful to work for a racecars company
let's do it in carbon fibers using a carbon fibers mould mado on the original one!!
Sometime it's useful to work for a racecars company
- Attachments
-
- mould & mainfold.jpg
- (110.05 KiB) Downloaded 98 times
-
- mould.jpg
- (123.25 KiB) Downloaded 76 times
Lotus Elan S2 n°538
-
ratman - Fanatic
- Posts: 410
- Joined: Mon 12.06.2006, 10:22
- Location: Perugia, Italy
by Enright » Thu 22.03.2007, 16:15
I have some carbon fibre cloth and resin, so I'll be very interested to see how you join the two halves together and then attach the extra pipe for the dump valve. I may end up making one of these myself using your instructions. How many CF layers are you using?
Also, how do you plan to make it so that you can attach it to the throttle body and the metal pipe that comes through the inner wing? It's not as flexible as the existing rubber part!
By the way, if you reduce your picture sizes to 640 x 480 pixels, the file sizes will be much smaller and they will appear in your post without having to download them into a seperate window.
Also, how do you plan to make it so that you can attach it to the throttle body and the metal pipe that comes through the inner wing? It's not as flexible as the existing rubber part!
By the way, if you reduce your picture sizes to 640 x 480 pixels, the file sizes will be much smaller and they will appear in your post without having to download them into a seperate window.
Striking fear into the hearts of duplicate posts everywhere...! 
BCingU,
Neil
BCingU,
Neil
-

Enright - Modificator
- Posts: 4860
- Joined: Sun 19.12.2004, 19:21
- Location: Arnold, Nottingham, England
by ratman » Thu 22.03.2007, 16:57
First of all, I used pre-preg CF and it’s a great improvement than CF and resin!
I made two carton wings useful to create a separation plane (see pic above).
Then I attached on the body of the gummy manifold some detaching tape.
Using 4 x 0.4mm pre-preg CF layers, I made the external mould.
Then, internal and external vacuum bag, oven 70° Celsius for 5 hours, 6 holes on the wings for guide dowels and the mould is done.
Now, after painting with detaching varnish, it’s time to laminate the manifold on the two halves, having care of let the CF longer in one part than the other one (in order to close the gap between the two sides).
After all, join the two halves, internal and external vacuum bag, oven 120° Celsius (no more original rubber manifold inside to be protected at only 70°) for 5 hours in autoclave and the job will done.
Note that I don’t want to fix it directly in the car but I think to cut it shorter than the original in order to use few cm silicon hoses.
Ciao, Federico
I made two carton wings useful to create a separation plane (see pic above).
Then I attached on the body of the gummy manifold some detaching tape.
Using 4 x 0.4mm pre-preg CF layers, I made the external mould.
Then, internal and external vacuum bag, oven 70° Celsius for 5 hours, 6 holes on the wings for guide dowels and the mould is done.
Now, after painting with detaching varnish, it’s time to laminate the manifold on the two halves, having care of let the CF longer in one part than the other one (in order to close the gap between the two sides).
After all, join the two halves, internal and external vacuum bag, oven 120° Celsius (no more original rubber manifold inside to be protected at only 70°) for 5 hours in autoclave and the job will done.
Note that I don’t want to fix it directly in the car but I think to cut it shorter than the original in order to use few cm silicon hoses.
Ciao, Federico
Lotus Elan S2 n°538
-
ratman - Fanatic
- Posts: 410
- Joined: Mon 12.06.2006, 10:22
- Location: Perugia, Italy
by techlectic » Fri 23.03.2007, 18:02
are you making any extra carbon fiber pipes? That's an upgrade I'd love to have.
- techlectic
- Enthusiast
- Posts: 146
- Joined: Tue 04.01.2005, 07:00
Re: R-Project
by ratman » Mon 31.08.2009, 14:16
I made the pattern for the new plinth (photo attached). In the photo (seen before in LEC forum) the model has the shape of the final part. I wanted to see if it is exactly what I need as it is changeable. It was in March.
Now, after several months, I like it really and I decided to modify the dummy plinth in order to make the real pattern, useful for the lamination of the CF mould.
I should be able to do it in less one month, I hope!
Now, after several months, I like it really and I decided to modify the dummy plinth in order to make the real pattern, useful for the lamination of the CF mould.
I should be able to do it in less one month, I hope!
- Attachments
-
- the dummy plinth, heavy but with the final shape
- IMG_0118_cr.jpg (99.94 KiB) Viewed 8302 times
Lotus Elan S2 n°538
-
ratman - Fanatic
- Posts: 410
- Joined: Mon 12.06.2006, 10:22
- Location: Perugia, Italy
Re: R-Project
by Paul.P » Tue 01.09.2009, 07:24
That looks very professional ratman, looking forward to seeing final outcome.
JPS M100 was built from bare chassis up to create one off M100 in the mould of JPS Team Lotus
- Paul.P
- God
- Posts: 4970
- Joined: Sun 14.12.2003, 18:18
- Location: Oakham, Rutland
Re: R-Project
by ratman » Tue 22.12.2009, 11:25
Yesterday I made this easy mod on my car. I hate the old clock, unreadable on daylight if the lights are on and I needed a out temperature termometer.
that's why I bought this one. (http://www.speedup.it/index.php?fuseaction=home.1131211) It is expensive because of the fact it is a little computer, but it was the only one with the size and colour (changeable) right to fit in the Elan.
Day light photos will be added
that's why I bought this one. (http://www.speedup.it/index.php?fuseaction=home.1131211) It is expensive because of the fact it is a little computer, but it was the only one with the size and colour (changeable) right to fit in the Elan.
Day light photos will be added
- Attachments
-
- original clock.jpg (64.07 KiB) Viewed 8156 times
-
- cut wires and connect new.jpg (74.01 KiB) Viewed 8156 times
-
- use the old as jig.jpg (76.38 KiB) Viewed 8156 times
-
- Jig.jpg (63.11 KiB) Viewed 8156 times
-
- use new as jig.jpg (71.95 KiB) Viewed 8156 times
-
- fitted.jpg (44.39 KiB) Viewed 8156 times
Lotus Elan S2 n°538
-
ratman - Fanatic
- Posts: 410
- Joined: Mon 12.06.2006, 10:22
- Location: Perugia, Italy
Re: R-Project
by ratman » Tue 22.12.2009, 13:33
sorry fr the quality of the photo!
- Attachments
-
- day.jpg (57.48 KiB) Viewed 8133 times
Lotus Elan S2 n°538
-
ratman - Fanatic
- Posts: 410
- Joined: Mon 12.06.2006, 10:22
- Location: Perugia, Italy
Re: R-Project
by tigerdog » Tue 22.12.2009, 16:26
Looks very good! It seems much more readable than the original. I like the colour-matching back light, too.
"Refitting is the reverse sequence to removal, but you swear in different places."
-

tigerdog - God
- Posts: 2715
- Joined: Tue 20.03.2007, 09:07
- Location: San Diego, CA, USA
Re: R-Project
by ratman » Tue 22.12.2009, 17:17
tigerdog wrote:Looks very good! It seems much more readable than the original. I like the colour-matching back light, too.
thanks! it has 4 base colours (blue, red, green, white) that could be fine tuned in order to match your colour that could be different from the OEM as well.
Lotus Elan S2 n°538
-
ratman - Fanatic
- Posts: 410
- Joined: Mon 12.06.2006, 10:22
- Location: Perugia, Italy
Re: R-Project
by ratman » Sun 27.06.2010, 11:14
new task!
my Kenwood stereo has the flip up panel. I like it because I can leave the front panel in the car during the parking periods of the car.
But a black plastic panel could be masked by a real (0.4 mm) carbon fiber panel with a chrome Lotus design sticker!
my Kenwood stereo has the flip up panel. I like it because I can leave the front panel in the car during the parking periods of the car.
But a black plastic panel could be masked by a real (0.4 mm) carbon fiber panel with a chrome Lotus design sticker!
- Attachments
-
- P6270093cr.jpg
- (238.28 KiB) Not downloaded yet
-
- P6270085cr.jpg
- (267.71 KiB) Not downloaded yet
Lotus Elan S2 n°538
-
ratman - Fanatic
- Posts: 410
- Joined: Mon 12.06.2006, 10:22
- Location: Perugia, Italy
Re: R-Project
by ratman » Thu 09.02.2012, 14:03
my CF mould did not worked as the pattern was not enough stiff..
I made a new pattern and I made a new GLASS fibre mould.
now I did a GF part using jigs to cut the fibre.
I'll post pics of the part in a shape closer to the finished one!
I made a new pattern and I made a new GLASS fibre mould.
now I did a GF part using jigs to cut the fibre.
I'll post pics of the part in a shape closer to the finished one!
- Attachments
-
- the mould
-
- the part into the mould
-
- the part out of the mould
Lotus Elan S2 n°538
-
ratman - Fanatic
- Posts: 410
- Joined: Mon 12.06.2006, 10:22
- Location: Perugia, Italy


20 posts
• Page 1 of 1
Return to Projects - Other (Minor)
Who is online
Users browsing this forum: No registered users and 4 guests