
| Home | WikiLEC | Repairs | Upgrades | Gallery | Buy & Sell | Mountain Chips | Meets & Events | Contact |
|
Smaug: Return of The Green Monster
Moderators: theelanman, dapinky, Specky, clemo, Nige, Sy V, Dave Eds, DaveT, Elanlover, muley, Enright, algirdas, nitroman, GeoffSmith
Samco Hoses on the way
 by tigerdog » Tue 06.05.2008, 18:31
-

tigerdog - God
- Posts: 2712
- Joined: Tue 20.03.2007, 09:07
- Location: San Diego, CA, USA
by tigerdog » Tue 17.06.2008, 18:20
-
tigerdog - God
- Posts: 2712
- Joined: Tue 20.03.2007, 09:07
- Location: San Diego, CA, USA
Found the leak
by tigerdog » Fri 20.06.2008, 21:47
- Attachments
-
- cracked_tank_2.JPG (29.54 KiB) Viewed 23211 times
-
- cracked_tank_1.JPG (37.93 KiB) Viewed 23211 times
-
tigerdog - God
- Posts: 2712
- Joined: Tue 20.03.2007, 09:07
- Location: San Diego, CA, USA
New parts are here, mostly!
by tigerdog » Fri 20.06.2008, 22:21
- Attachments
-
- Genuine Lotus parts.
- new_tank_and_cap.JPG (122.58 KiB) Viewed 23211 times
-
- Dr Seuss Band Instruments :-)
Samco normally ship bright lime green. BRG is bespoke special order but it's available if you ask. - brg_cooling_hoses.JPG (97.21 KiB) Viewed 23312 times
-
tigerdog - God
- Posts: 2712
- Joined: Tue 20.03.2007, 09:07
- Location: San Diego, CA, USA
Disassembly begins
by tigerdog » Sat 21.06.2008, 00:17
- Attachments
-
- In there somewhere...
- HeaderAndHTLeadsRemoved.JPG (154.93 KiB) Viewed 23146 times
-
- Ah - there they are!
- NoIntakePipes.JPG (166.18 KiB) Viewed 23146 times
-
tigerdog - God
- Posts: 2712
- Joined: Tue 20.03.2007, 09:07
- Location: San Diego, CA, USA

by tigerdog » Sat 21.06.2008, 14:49
Monty wrote:Is that the standard turbo heat shield on the Garrett?
Yes! I thought that Houdini did a particularly nice bit of camouflage there. Only the offset bolt hole gives it away. Better view here.
-
tigerdog - God
- Posts: 2712
- Joined: Tue 20.03.2007, 09:07
- Location: San Diego, CA, USA
Clamps arrived but...
by tigerdog » Sat 28.06.2008, 20:18
Clamp set arrived on Friday. I gleefully opened the envelope and proceeded to match clamp to hose-end. As you can see from the photo, I received a couple of unneeded clamps (probably for the odd double-90 degree lower radiator connector that's not included in the Fed set). Unfortunately, the kit is also missing six of the smallest size, needed for the turbo coolant and heated throttle body lines. I've contacted James at Amber; I'm sure they'll make things right.
- Attachments
-
- Clamps without hoses, hoses without clamps
- OopsWrongClampAssortment.jpg (479.26 KiB) Viewed 23072 times
-
tigerdog - God
- Posts: 2712
- Joined: Tue 20.03.2007, 09:07
- Location: San Diego, CA, USA
e.e. cummings was a lotus owner
by tigerdog » Mon 30.06.2008, 06:11
Until today, I did not realize poet e.e. cummings had owned a Lotus or at least changed Elan hoses. Nothing else could as well explain the last line of the poem somewhere i have never travelled,gladly beyond which reads, "nobody, not even the rain, has such small hands".
-
tigerdog - God
- Posts: 2712
- Joined: Tue 20.03.2007, 09:07
- Location: San Diego, CA, USA
by lotusgirlmarie » Mon 30.06.2008, 07:54
-

lotusgirlmarie - Goddess
- Posts: 1434
- Joined: Thu 14.07.2005, 07:35
- Location: Earth or there abouts


by tigerdog » Tue 01.07.2008, 01:04
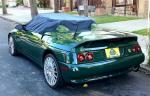
lotusgirlmarie wrote:You know whats alittle deja' vu, Ekapol had the exact same issue....... with the overflow tank.
After installing this one, I'm going to jump on the group buy on the "LGM Special Edition Polished Aluminium Overflow Tank" that uses a standard dual seat 15PSI cap and has a drain hose that drops down past the ignition so overflow doesn't disable the car...

...

-
tigerdog - God
- Posts: 2712
- Joined: Tue 20.03.2007, 09:07
- Location: San Diego, CA, USA
Hose Installation Complete!
by tigerdog » Thu 10.07.2008, 00:46

One word of wisdom: especially with the big ugly hose, don't tighten any clamps until everything is slipped in place! I found it easiest to work from the firewall forward and moved mostly in this order:
- Heater pipes.
Heater valve.
Y-Pipe.
(metal junction pipe)
Jumper from one metal pipe to the other - has to slip on prior to bolting the metal pipe to the engine.
Throttle body pipes.
Pipe from Y to electric pump.
(if I had the stock turbo, I'd do those hoses here)
Big ugly hose - starting at water pump, then radiator, then electric pump, then overflow tank.
Lower hose from radiator to thermostat housing.
Removing the old heater hoses was a chore. I loosened the clamps, then sliced through the old hoses where they were well-stuck to the heater core inlet and outlet. Though at first glance the heater hoses are simple "S" curves, there's a particular orientation to make them line up. I learned this by installing them in the opposite orientation.
 This photo shows orientation as if facing the firewall from the front of the engine bay. Firewall end is at the left.

Tightening the heater hoses is not fun. I settled on a socket with two wobble-extensions and a nut-driver handle.

The heater clamps have to be oriented just-so in order to be accessible.

After removing my old heater valve, I'm now firmly convinced there are only two kinds on M100s - those that have been replaced and those that need to be replaced! The parts cross-reference lists a Jaguar part that fits. I sourced a valve from my local NAPA auto parts store (US equivalent to Halfords, maybe.) NAPA part number BK 6601230 is all plastic (no rust), normally open as needed by the Lotus and is cheap at $14! The vacuum fitting is the same size as the outside diameter of the Elan's vacuum pipe, so it won't stretch to slip on to the valve. I made an adapter using about 1" of larger hose, pushed the lotus vacuum hose inside, then slipped it onto the valve.

Routing the big ugly hose is especially challenging. Water pump-to-radiator is self explanatory and there's only one place the side branch can get past the AC.

From there, I ran the hose along the anti-roll bar, over the radiator support and just behind the cooling fan to reach the electric pump.


My Samco kit seems to assume the distance from the front of the car to the firewall is about two inches longer than it is. This photo clearly shows the overlap on the two pipes that run back from the electric pump to the "Y" pipe. Making matters worse, the Big Ugly Hose section from the e-pump to the header tank was similarly too long.

In the end, the hoses in my kit would simply not allow me to keep the electric pump on its factory mount. Mine is now securely tied to the (non-standard) turbo-to-intercooler duct using handy nylon ties and appropriate padding.

In the end, three hoses were not replaced: coolant to and from the turbo housing is non-standard because of Houdini's pioneering Garrett T2560 conversion, and the infamous radiator connector that Samco have apparently never managed to duplicate. I believe the best way around this will ultimately be to use a stock 45 or 90 degree pipe out of the radiator and bend a new metal pipe to connect it to the pipe running up to the thermostat housing.
Here's a pic of the final result
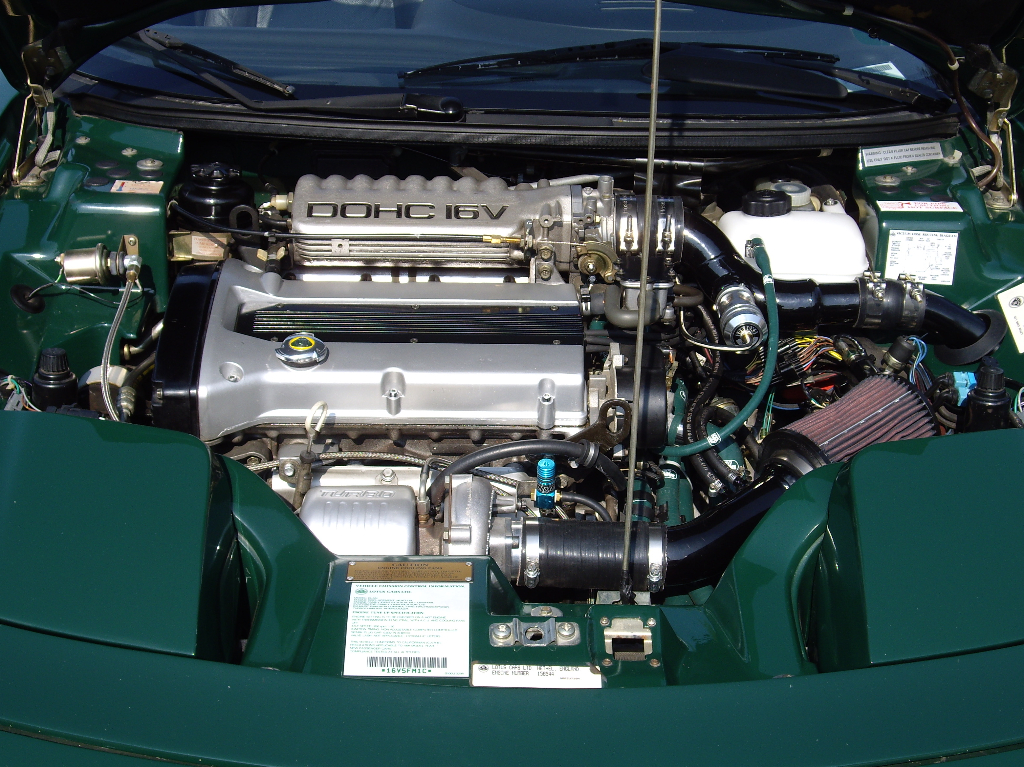
Now, how do you keep these sticky silly-cone hoses from gathering dust and looking filthy?
-
tigerdog - God
- Posts: 2712
- Joined: Tue 20.03.2007, 09:07
- Location: San Diego, CA, USA
Next Topic - Wilwood Installation
by tigerdog » Tue 22.07.2008, 20:15

-
tigerdog - God
- Posts: 2712
- Joined: Tue 20.03.2007, 09:07
- Location: San Diego, CA, USA
Re: Hose Installation Complete!
by nitroman » Sun 27.07.2008, 22:39
tigerdog wrote:Now, how do you keep these sticky silly-cone hoses from gathering dust and looking filthy?
TigDig, GoJo (the kind you use on your hands) does an A1 job on silicone hoses & ignition wires too.
Take the best that exists & make it better. (given inclination)
If it doesn't exist, create it. (God did)
Ignore what I say. (good advice)
-

nitroman - Moderator
- Posts: 3554
- Joined: Fri 18.04.2003, 01:17
- Location: Jacksonville, FL
Brakes! After a short intermission...
by tigerdog » Fri 24.07.2009, 08:05
-
tigerdog - God
- Posts: 2712
- Joined: Tue 20.03.2007, 09:07
- Location: San Diego, CA, USA


Re: Smaug: Return of The Green Monster
by tigerdog » Sat 25.07.2009, 20:24
The "Doug's buying the beer installation party" invitation is still on the table, Brian!F1 LOTUS wrote:'bout bloody time
 Stone IPA? Newkie Brown? Unibroue Trois Pistoles? Budweiser?
  Tecate?
 Or perhaps some fava beans and a nice chianti? What does it take to intice a master?
Kidding, of course (well, half kidding!)-
tigerdog - God
- Posts: 2712
- Joined: Tue 20.03.2007, 09:07
- Location: San Diego, CA, USA
A Small digression - BOV to CPV
by tigerdog » Thu 13.08.2009, 18:51
In any case, this was $40 well-spent. Click for full details of the valve project and for a discussion of how to set up a blow-off valve.
-
tigerdog - God
- Posts: 2712
- Joined: Tue 20.03.2007, 09:07
- Location: San Diego, CA, USA
Wilwood bolts - AGAIN!
by tigerdog » Thu 13.08.2009, 18:59

-
tigerdog - God
- Posts: 2712
- Joined: Tue 20.03.2007, 09:07
- Location: San Diego, CA, USA
Return to Projects - Other (Minor)
Who is online
Users browsing this forum: No registered users and 2 guests