

 , The warning is that taking this project on could seriously scramble your brain, and the disclaimer is that I cannot be held responsible if you use the Stanley blade on something other than rubber
  .
.Right, before I get into the details I must also warn you that this is a fairly complex procedure and to be able to successfully complete it you will need the patience of 20 Saints, good with your hands and most of all an ability to adapt/improvise and problem solve and then some!.
I am going to start the project with the most difficult seal, the falling pillar or B post as some may call it, the reason for that is if you can make this one you will succeed with the other two for sure.
I will start it with a selection of tools you will need.
1. Angle Grinder / with sanding discs, absolutely essential, you will use this for a whole hill of tasks some of which are pretty dangerous I suppose, But you have to be the Master of this tool, you will use it constantly and do very precise sanding with it, this is what causes the toxic black dust so be warned, a mask is essential EVERY time, and goggles when cutting/shaping brackets, conscientious folk will use it outdoors only, preferably when its windy!.
2, Stanley blade, with split new blades.
3.Hacksaw
3. Drill and a variety of bits
4.Most other tools needed will be the usual stuff which everyone has but you will need a rivet gun with a selection of smallish rivets.
The other things you will require.....
Loctite 480, used for the bonding of all rubber parts, this stuff is fantastic, it is black and remains flexible, it is stronger than the rubber itself, if you bond 2 pieces then try to separate it the rubber tears not the joint.
Tube of black sealant, sikaflex or similar, this is used for bonding the bracket to the seal.
Stainless screws and some small stainless plates, 2mm thick.
There may be some items im forgetting but we will pick up on those as we go im sure.
Right down to the most important things you will need!, once again I would like to state that I don't want people rushing off to buy parts for a project that may turn out to be just too much for them to achieve, just be as sure as you can be that you feel confident to take the task on before buying stuff, but the good thing is the parts should be pretty cheap, just don't go to a Main Stealer for the seals!, Feebay or Autobreakers is the place, so what you want is this....
1 Door surround seal from a Peugeot 207 hatchback, not CC!, This is the seal that goes round the frame, not the one that's attached to the door itself, its the seal the door closes onto. widely available for a small outlay.
2. One set of seal brackets (stainless) from a mk2 MR2, The rubber from these is handy for cutting up into the seal end closing, not bulky enough to use for A post seals these although they will fit in the bracket the glass wont shut tight against them, been there tried that!.
And that's about it really, so I will give a basic rundown of whats required to get these done, obviously cant do it all at once so I will keep the thread updated as we go along.
Right the first step, we take a section of the seal, 47cm is ideal, it needs a hacksaw to cut as it has a stainless insert which grips the car frame, and the bracket you are going to construct!, at the base we cut out part of the stainless insert, approx. 9cm of it and this allows us to construct this flap which attaches to the underside of the hood, its folded back and bonded but it needs a slight angle upwards where the base part aligns with the door, as you can see on the bottom left here...

The next step we take is to use wire snips and make all these cuts in the rubber at the top, this is the clever bit!, it allows the seal to curve around the glass as that then releases the hold on the insert and allows it to be shaped to the curvature of the window!, thus....

That's basically it with the rubber for now, we then move on to making the bracket, this becomes a bit involved and can seriously test you so beware, it needs to be shaped fairly specific and the only way really is trial and error, you will have to cut of the main black plastic coated part that comes with the seal and then it will have to be manipulated into the shape required by lining it up with the glass and the hood, some bits will need hammered straight and other bits more curved, the most important part is the curve at the top, what I did here was to make a few cuts with a thin grinding disc and this enabled it to be shaped, like this...

You will also notice the 2 lugs for connecting to the hood frame which looks like this..... Actually a really good way to connect them for various reasons, the slot in the bracket can be elongated for adjusting as well.

Now what we want to do is cut up that MR2 seal and bond it to the bracket like this pic, the back of this will go up against the hood and with a line of black sealant will waterproof it perfectly, the top part needs to be left loose as this will be folded upwards to fill the space above that part and fold over the metal part of the frame. Edit, I have found a better piece to do this part, it is found on the slam panel of a Ford Mondeo, just a long piece which has a metal insert at the base, cut along each edge of the base and you will then have a strip perfect for this part of the job, widely available.

Now we can just join those 2 parts together, the seal insert should be hand crushed a bit tighter together for better grip on the part of the bracket that fits into it, like this...

And another showing it with the backing rubber...

There is also the end closing cap to put on and shaped but that's pretty simple stuff, then its time to put it on the car and see how its sitting....

Close the door and make adjustments checking for gaps and general tidying up, bear in mind im not sealing these to my car so bits will be a bit rough in the meantime.

So that's about it for stage one, obviously there is a fair bit more to it than whats shown but anyone doing it is welcome to ask questions regarding any other aspects.
Enjoy!
.Jamie.

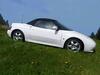

 !!WOW!!




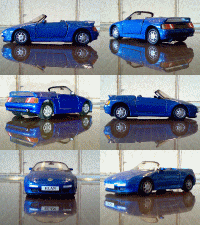




 I took the opportunity to order and fit some custom Samco coolant hoses whilst it was in bits, but they took 3 weeks to come so held things up a bit. The hood seals are on my to do list when I get it back, but as previous poster said it is good to read up on the work required and source the bits in the meantime.