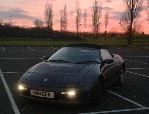
While I wait for the 13mm long-reach spanner, I can't do much more on the suspension. Thats a 20-page thread in itself. I did, however following dave's washer alert, buy a £3 LED rolson magnetic pickup tool which swiftly dislocated and safely removed the washers. Invaluable:
To pass the time, I did a little bit of planning.
My big projects are in rough order:
Change Suspension & Brakes (ongoing)
Install all lights, square up bumpers & fit properly.
Install new intercooler, final pipes & finish engine detail.
All Service Items (can't do fuel filter until car is back down, can't change oil until brakes are back on, need to look into PAS)
Change Windscreen (can't do until car is back down)
Fit Roll Cage (can't do until fuel filter is changed, and until wheel colour is fixed which will be decided once brakes are in)
Install stereo (can't do until dash is out, but can do - and will need to do - some planning before dash comes out)
Change Dash (can't do until windscreen is done)
Install all other electrics & cosmetics (can plan but not complete until dash is out)
So the next thing to do
on the car, while I refurbish all the brake & suspension parts at the new workshop, is to get the lights set up properly and start on the final engine detailing.
I've done the side indicators - but they click too fast and I don't want to push the lenses home until I am sure there is no bad wiring. The only way to be properly sure that its not the module, is to get the resistance correct in the system.
So I decided next step was to get the lights sorted out; there are some decisions to make about how much additional lighting I install.
I pulled all the headlight lenses from the pods by removing the screws which mount to the outer of the pods, one had to be drilled off (circled):
To get the actual lenses out you firstly have to turn them round inside the pod to pull out the harness (circled), then once slid out you need to remove the little cable retainer (arrowed):
Position is important so nothing fouls on re-install. Looking at the state of the insulation on my cables, they've been fouling for a while:
I'll need to fix that up on the main beam cables. I will probably run the halo wires inside the new sleeves.
Removal is easy enough for the inner (main beam) light, but the outer beam (dip) necessitates spinning the light inside the pod, exposing the rubber boot:
….and pulling off the centre right-angle (+ve) and outer straight clamp terminals (once the light is out, its obvious these are red and black).
Then you can undo the screw inside the pod:
Once I'd got the lights out, I grabbed the group buy headlight pod kit. There are nice fresh springs and screws in there, and Dave Pink had already sorted me out a bling kit which contains some of the pod mount screws, polished.
I'm going to be replacing the sidelights with LEDs.
The other thing I want to do is
GoM100Go's Halo mod, and possibly some DRLs.
All of this needs to be reversible. I spent some time revising the DVLA/UN rules.
It seems like DRLs are fine to install but should switch off with the headlights coming on. So I will need some wiring for that.
LED sidelights are also OK but to be safe, I'm going to try to work it so that you can quickly switch to the original bulbs. So I will need a switch for that. As fitting for all of this is going to be done with the bumpers off, I need to set it up so its easily changeable with bumpers on.
The Halo's are purely cosmetic, but the halo-type casings recommended by James are a direct retro-fit to our headlight pods (by the look of things):
So they seemed like a good purchase, it must have been 2 years back I bought them so they seemed at the time the best way to clean that area and make it look new again, the halo's being the least of the reasons.
I thought about it for a while and the best thing is to have a seperate switch for the Halos, that can be activated to let them run inline with the dipped or main headlight beams.
The way I want to do this is:
Ignition on: DRLs on (but need a master kill switch in case they affect the front indicator visibility)
Switch sidelights on: DRLs remain on, sidelights come on
Switch headlights on: DRLs turn off, sidelights do whatever they always did
Press indicator: sidelight at correct side dims if on, front, side & rear indicators flash
Press Halo switch - if light pods are up, halos come on
The best way to test all of this is on the car, so the task list for this is:
Remove front bumper (which I am best to wait & do after the suspension is out - in fact no, I could do this now)
Build refinishing greenhouse (you'll see!)
Refinish back lights
Install original light system completely
At present, the outer beam lights continuously when headlights are on, activating the high beam switch puts the inner one on.
The pod opens and closes only at the main dip/full beam setting.
I made a mockup with various lights and these are the ones I decided upon - they are Osrams, fully road legal and come with the fitting kit - sounds like they can be automatically dimmed when the main beams come on. So I am very pleased with that:
Dismantling the full beam assembly first, all seemed straightforward. Remove the top surrounds:
Then undo some bolts at the back and it all falls apart:
The dipped beams are set at an angle, hence the springs. I'll learn how to do this before I go to MOT.
The housings take an H4 bulb; and James mentioned he had gone with an H4 conversion, so I'd ordered what he specified including the wedge bulbs for the halo surrounds.
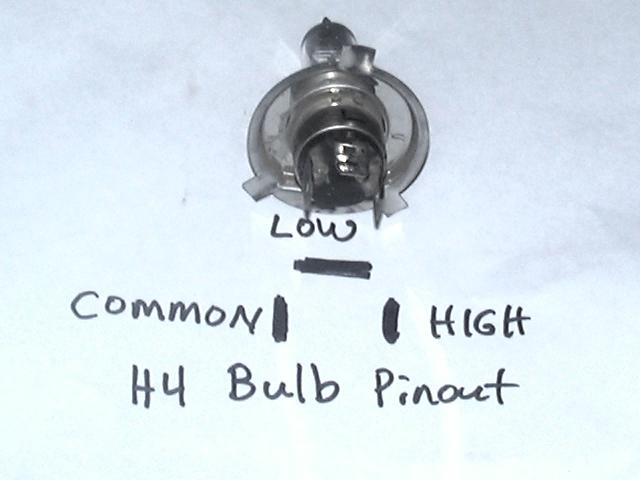
However, in his picture he has H4 as his dip beam lights too. Wasn't 100% sure about this. Did some reading and an H4 bulb has two filaments, one for low and one for high beam. So looking at the pin layout I found this useful diagram:
http://www.4crawler.com/4x4/CheapTricks ... Pinout.jpgSo I can connect the H4s as low beam on one section, and high beam on the other. This does open up the option for a double high beam, so that when the high beams come on, they come on to both lights. But I dismissed this idea for now as I want it to get through an MOT and you are not recommended to fire both filaments at the same time, so you'd need to jig it so that when the high beam came on both the outer and inner, the outer dip filament went off. Also there might be issues with the resistance running 2 lights, so given the tightness inside the pod, and the fact the inner fullbeam H4 connector was already a bit melted after 20 years, I decided to keep things as-is but go for all new connectors. I could only find wired ones and I don't want to increase the wiring length inside the pod, but I'll cross that bridge when I see them.
I decided to hang on with the suspension job looming, I need to refurbish a lot of parts so the next step is to get my assembly line going!


 - obviously, if you do end up mullering the captive nut, you will need to get new bolts for that particular place as you probably won't have enough thread to re-fit the old ones - just a standard (High tensile, 8.8 - or A4-80 if using stainless) M8 x 75 bolt - remember that if you go for stainless, you only need 18Nm of torque to do it up, not the 22-25 it states in the manual for normal steel!!!