Alternator, waterpump, A/C, sensors, CAS, etc.
Moderators: theelanman, dapinky, Specky, clemo, Nige, Sy V, Dave Eds, DaveT, Elanlover, muley, Enright, algirdas, nitroman, GeoffSmith
 by Avonvilla » Fri 04.05.2007, 18:12
Looks like my condenser is leaking so need to get it out

I've taken the bumper off and had a look but cant see an easy/obvious way to get it off ?
Checked the online manuals but cant see any referance to removing it, do i have to remove the radiator as well or can i just get this off somehow

Thanks
-

Avonvilla
- Fanatic
-
- Posts: 424
- Joined: Tue 22.04.2003, 00:01
- Location: Staffordshire
by Simon_P » Sat 05.05.2007, 11:57
Yes you do have to take the radiator out. Once the radiator is out there are only 2 bolts to remove to release the condenser
Jack the front of the car up high enough to remove the radiator.
Take the pannel off
Remove radiator support bracket, fans etc See manual
remove radiator - It is located at the top by a grommet in a pannel with a spiggot on the radiator Buy new grommets the old ones will tear or fall off - when they fall off they are in a box section and difficult/impossible to get out.
I can't remember what the sequence is but if you leave the hoses in place they will a. hold the radiator in place and b. you dont get wet/dripped on
Once you have removed the radiator you will have access to the top mounts of the condenser = 2 bolts (R12 system) - Buy new rawlnuts and the bolts - Chances are they will be siezed /perished
Pictures:
Mounting - The white circle is where the radiator grommet goes - Near to it you can see the rawl nut in place
Mounting 2 the radiator/ condenser cavity
Not a difficult job but one that requires time/patience a 1/4" socket.
You will graze the backs of your hands on every sharp edge
New grommets and Rawl nuts will make reassembly much easier
Regards,
Simon
- Attachments
-
 Mounting 2.jpg
- (86.22 KiB) Downloaded 93 times
-
- Mounting.jpg
- (89.3 KiB) Downloaded 87 times
-
Simon_P
- God
-
- Posts: 2602
- Joined: Fri 06.08.2004, 12:33
- Location: Kent UK
by Avonvilla » Sat 12.05.2007, 13:26
Thanks Simon, just gotten it off

-
Avonvilla
- Fanatic
-
- Posts: 424
- Joined: Tue 22.04.2003, 00:01
- Location: Staffordshire
by nitroman » Mon 05.01.2009, 02:37
Simon_P wrote:Yes you do have to take the radiator out. Once the radiator is out there are only 2 bolts to remove to release the condenser
Jack the front of the car up high enough to remove the radiator.
Take the pannel off
Remove radiator support bracket, fans etc See manual
remove radiator - It is located at the top by a grommet in a pannel with a spiggot on the radiator Buy new grommets the old ones will tear or fall off - when they fall off they are in a box section and difficult/impossible to get out.
I can't remember what the sequence is but if you leave the hoses in place they will a. hold the radiator in place and b. you dont get wet/dripped on
Once you have removed the radiator you will have access to the top mounts of the condenser = 2 bolts (R12 system) - Buy new rawlnuts and the bolts - Chances are they will be siezed /perished
Pictures:
Mounting - The white circle is where the radiator grommet goes - Near to it you can see the rawl nut in place
Mounting 2 the radiator/ condenser cavity
Not a difficult job but one that requires time/patience a 1/4" socket.
You will graze the backs of your hands on every sharp edge
New grommets and Rawl nuts will make reassembly much easier
Regards,
Simon
All that is informative but I've got the USA version. All I want to do is put in a new radiator-support-frame I had powdercoated. The old one looks like someone beat it with a hammer! You can see the basic difference between the two in section KD of the repair manual. Non-USA is shown on page 9 & USA on page 10. Here's the problem: I can't get the two nuts off without also backing out the threaded-shaft inside the spacer-tube. That's bad because the nut on the top of the threaded-shaft is not captive. If I remove the shaft I'll never be able to mate it again to the "loose nut" on top. As you may know, a loose nut is something best avoided; so I've heard.
I have two possible thoughts and look forward to what you might have to say.
1) If I remove 'everything' I might be able to displace the A/C condenser enough to glue the top nuts to the frame. To me this stands the best chance. Still though, I can't remember disassembling other components with only a hunch in hand.
2) If I have enough room to get my drill's flexible extension shaft into the narrow space I could cut a 'trough' into the bottom of the threaded-shaft such that I could insert a screwdriver to keep it from rotating whilst I back the bottom nut off. I am almost certain there is not enough room though.
Here are some pictures to keep you from fantasizing.
- Attachments
-
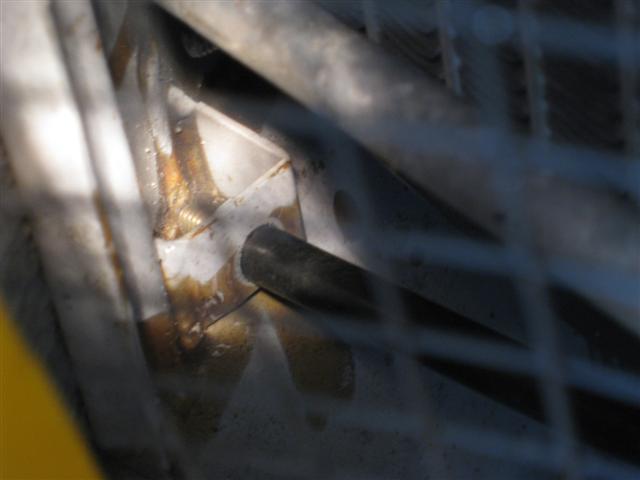
- top-nut-hidden.JPG (27.17 KiB) Viewed 1473 times
-
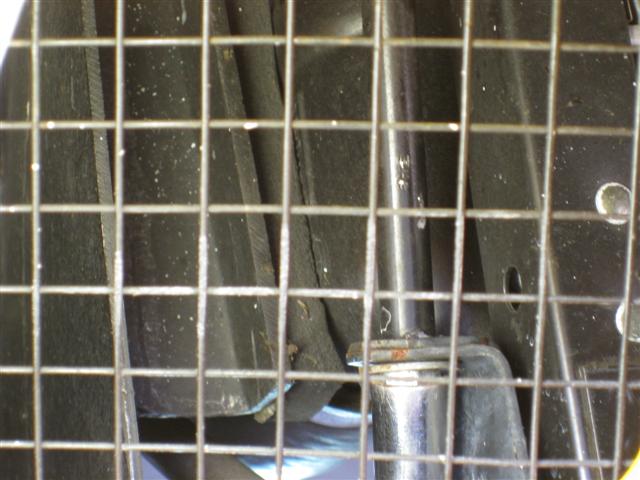
- bottom-nut-with-socket-on.JPG (51.17 KiB) Viewed 1473 times
-
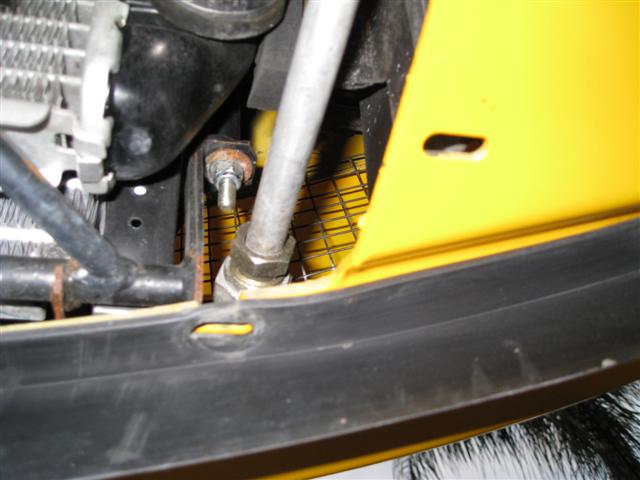
- bottom-nut.JPG (42.4 KiB) Viewed 1473 times
Strive for perfection in everything. (given time)
Take the best that exists & make it better. (given inclination)
If it doesn't exist, create it. (God did)
Ignore what I say. (good advice)
-

nitroman
- Moderator
-
- Posts: 3554
- Joined: Fri 18.04.2003, 01:17
- Location: Jacksonville, FL
by nitroman » Mon 05.01.2009, 08:08
I have one other half-ass idea: Cut off enough of the chicken-wire-mesh on either end to be able to reach in and palpate the top nut.
Strive for perfection in everything. (given time)
Take the best that exists & make it better. (given inclination)
If it doesn't exist, create it. (God did)
Ignore what I say. (good advice)
-
nitroman
- Moderator
-
- Posts: 3554
- Joined: Fri 18.04.2003, 01:17
- Location: Jacksonville, FL
Return to Engine Ancillaries
Who is online
Users browsing this forum: No registered users and 4 guests
