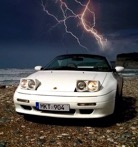
Jeemy's Elan Rebuild

Moderators: theelanman, dapinky, Specky, clemo, Nige, Sy V, Dave Eds, DaveT, Elanlover, muley, Enright, algirdas, nitroman, GeoffSmith

Re: Jeemy's Elan Rebuild

Postby theelanman » Mon 03.06.2013, 17:21

Jeemy wrote:The valve cover is the cam cover right?


erm
sort of.....

the plug cover is your CF bit...
the cam cover is the metal bit that says Lotus-Isuzu on it
I’m normally not a praying man, but if you’re up there, please save me, Superman.
User avatar
theelanman
Moderator
 
Posts: 7296
Joined: Fri 30.04.2004, 15:52
Location: peak district

Re: Jeemy's Elan Rebuild

Postby Jeemy » Tue 04.06.2013, 10:13

Pages 24-25 of the manual take you through removal of the HVLs with the engine still on the car. Doesn't look too difficult, while at the same time looking completely daunting. Hopefully the problem will clear. Today she should move on her wheels for the first time in a year…..
T: 0800 084 3084
M: 07391 295 146
User avatar
Jeemy
God
 
Posts: 1197
Joined: Tue 26.06.2012, 14:53
Location: East Lothian, Scotland

Re: Jeemy's Elan Rebuild

Postby HJ2 » Tue 04.06.2013, 10:31

One word of caution: CAM belt needs to go also...
If you always do what you always did, you always get what you always got
User avatar
HJ2
Wodan - God of the Low Lands
 
Posts: 4405
Joined: Fri 06.06.2008, 10:54
Location: Delft, the Netherlands

Re: Jeemy's Elan Rebuild

Postby Jeemy » Tue 04.06.2013, 11:25

Yes I see in the manual. I had this changed for me when I first got the car together with the water pump and tensioner assembly as a precaution, although it had been done 10,000 miles previous according to (incomplete) records. Working on the heatshield assemblies now, she will get her first run up to full temperature today; together with a short cooling run (assuming all is in order with gears!), and hopefully this will clear the problem.
T: 0800 084 3084
M: 07391 295 146
User avatar
Jeemy
God
 
Posts: 1197
Joined: Tue 26.06.2012, 14:53
Location: East Lothian, Scotland

Re: Jeemy's Elan Rebuild

Postby Jeemy » Tue 04.06.2013, 15:00

Pictures are running behind reports……

Final checks before taking down off ramps:

Retorqued the steering wheel bolt, another thing I never needed to remove, to 30Nm:

P1010824.jpg


Tightened the manifold nuts I can only reach with a spanner once more, just as tight as I could get them:

P1010825.jpg


Put some conduit on the cables for the radiator; I will need to cable tie a lot of things further down the line:

P1010826.jpg


And refilled the coolant adding Water Wetter as I go:

P1010827.jpg


Refixed the dipstick engine mount (and the one to the manifold, which should be done before these two!):

P1010828.jpg


And the coolant pipe/engine lifter:

P1010829.jpg


I have a car again!

P1010830.jpg


I ran the engine for a full 20-25 minutes until the cooling fans kicked in, which they happily did. I had a plastic cable tie ready to poke in to check but there was no need they are very audible. Once they did I followed Cliff's instructions and switched off and ran around to the coolant pump but couldn't feel anything. I'm not too fussed, I am sure it works and I did the test wrong.

I took her out for a mile just running up and down the industrial estate. Gears including reverse all select very nicely. Temperature came right down even with a short run.

So here is where I am:

- hazard delay module fell out as soon as I accelerated! I'll need to fix that back up and ensure it doesn't do it again!
- I have no rev counter reading
- I do get a boost reading on boost, no unpleasant noises from the turbo
- oil pressure drops on acceleration then goes back up, I think this is normal
- I still have tapping but I will be patient and see if it goes away after a longer run

Before a longer run I have to book in an MOT so I can take her legally on the road. I also have to work out how to fit the top turbo heatshield. As far as I was aware only the top one fits after you put in the Piper downpipe. But I thought you could get 2 fixings to back and front and you'd have to copy HJ and make a bracket for the left mount.

In fact the front mount seems to mount to the middle heatshield. I couldn't see any fixings for that.

All in all seems very positive, I still have some coolant leaking out but I am sure its just a hose needing tightened…...
T: 0800 084 3084
M: 07391 295 146
User avatar
Jeemy
God
 
Posts: 1197
Joined: Tue 26.06.2012, 14:53
Location: East Lothian, Scotland

Re: Jeemy's Elan Rebuild

Postby Jeemy » Tue 04.06.2013, 16:23

Rev counter fixed, its the brown wire going to the 5-pin plug in the DIS under the coolant tank. Just needed a push home, obviously de-seated when I pulled the connector. Cheers to Geoff for previous advice given here which helped me fix it.

I am hoping not to have to jack her again but coolant leak, fitting some turbo heatshields somehow, and removal of the rubber spoiler which is predictably rusted on, all need fixed and probably means I'll have to.
T: 0800 084 3084
M: 07391 295 146
User avatar
Jeemy
God
 
Posts: 1197
Joined: Tue 26.06.2012, 14:53
Location: East Lothian, Scotland

Re: Jeemy's Elan Rebuild

Postby Jeemy » Tue 04.06.2013, 18:59

DONE!

All problems appear fixed!

Coolant after a long period of tightening seems not to be dripping out anywhere.

Used a right-angle bracket bent in a vice to make a bracket for the turbo heatshield which is on with no unseemly vibrations:

I used POR15 Engine Enamel for this one, its a much better paint than the eBay cheapo stuff. Still not perfect, I had given it several coats of cheapo and a good sand but even getting paint to stick to it was a chore; I'll see if I can have it over-coated when I do the cam and cas covers.

P1010831.jpg


Tapping seems to be lessening. Maybe I am just getting used to it. I will compare against my video I took after a proper run. I've done 1.8 miles in her now, all gears tested fine; reverse sometimes needs a declutch before you can engage it without force but I still have to change the trans. fluid.

Only thing is maybe the electric water pump doesn't work, thats twice I've got it til the fans go on (although 2nd time they went straight back off after 20-30 seconds) and ran round to check the pump and felt nothing. I don't know how essential this is and its something thats easy to access; at £130 I'll take my time on that one.

Have started on prepping the bodywork for paint shop, this should be done in a day as I know exactly what I am doing for once. More pics tomorrow!
T: 0800 084 3084
M: 07391 295 146
User avatar
Jeemy
God
 
Posts: 1197
Joined: Tue 26.06.2012, 14:53
Location: East Lothian, Scotland

Re: Jeemy's Elan Rebuild

Postby Jeemy » Tue 04.06.2013, 22:11

Back into known territory, it all started moving faster…..

I started to debadge the car ready for paint, starting with the bolts on the Lotus logo…..

P1010832.jpg


Using the scraper on the left I prised off the back logos, its easier if you start with serifs!

P1010833.jpg


I brushed all of the remaining goop with Tardis using a paintbrush:

P1010834.jpg


Including the two different front numberplate mountings, both clear silicon and self-adhesive double-sided pads, the boltholes having died years back:

P1010838.jpg


I washed the back down immediately, as Tardis can be cruel to plastics, and I want to retain the offside rear lens, not to mention the bodywork! You can see how far to the right the silencer has travelled over 2 miles driving; I'll need to look at this before spray:

P1010835.jpg


After a few minutes of Tardis the remainder scraped off pretty easily, I brushed on again and using the scouring pad side of a sponge scourer, removed all the remaining sticky stuff:

P1010836.jpg
T: 0800 084 3084
M: 07391 295 146
User avatar
Jeemy
God
 
Posts: 1197
Joined: Tue 26.06.2012, 14:53
Location: East Lothian, Scotland

Re: Jeemy's Elan Rebuild

Postby Jeemy » Tue 04.06.2013, 22:28

There are two pictures ending 5 & 8 above I cannot reverse…..they are in the wrong places…….

The front ended up like this:

P1010837.jpg


I started to work on the bad lacquer. Wet-sanding, I'd normally be working much slower at 1200-1800 grit but as this is pre-prep for a gel coat and spray, I went hard at the paint with 600 grit.

Good examples were these two bonnet defects:

*note in all of this, the 'matt' / 'roughened' areas could polish back to original. You just wouldn't want to start on 600. But its better for the next paint/gel to grip.

P1010839.jpg


After a quick sand, they looked like this. You COULD polish this back up, and starting at 1200 with a little more care, all of the paint bar a headlight could have been corrected. Right, thats it, I'm not saying it again……

P1010840.jpg


Next was the peeling lacquer at the edges of the bonnet. Its hard to photograph but very visible:

P1010843.jpg


After a sand and wipe, you can see the line is much clearer, but also how much paint this is taking off:

P1010844.jpg


My paint thickness meter is in the other van, but out of a what, 5-8 plus lacquer, there must have been a couple coats max left, I was through on the headlight before the cracking dispersed:

P1010845.jpg


Even worse after a polish:

P1010846.jpg


But the point is, a smoother but porous surface for the gel coat.

The cracks at the other side are pictured mid-sand, again, I want enough surface roughness to take on the gel, but the defining lines of the damage removed:

P1010847.jpg
Last edited by Jeemy on Tue 04.06.2013, 23:47, edited 1 time in total.
T: 0800 084 3084
M: 07391 295 146
User avatar
Jeemy
God
 
Posts: 1197
Joined: Tue 26.06.2012, 14:53
Location: East Lothian, Scotland

Re: Jeemy's Elan Rebuild

Postby Jeemy » Tue 04.06.2013, 22:36

A good example is the rear tonneau cover.

After a wipe to remove surface dirt, this is what most of us have:

P1010848.jpg


After a wet sand and before a wipe, the rough line is almost gone, but the dirt and ferrous particles have penetrated the lacquer:

P1010849.jpg


Nonetheless, a good scrub with a rust-removing cleanser, takes the first 1/8 to almost un-noticeable - you can see the line where the untreated damage restarts:

P1010850.jpg


As an experiment, 600 grit notwithstanding, I treated the whole area, after a sand, it looked liked this. Note I would normally sand out right to the edges in increasing grit numbers and would have started with about 1200 here:

P1010855.jpg


After a quick rubdown with a sponge:

P1010856.jpg


And then a going over with Last Touch, which is not a polish, just a quick crap/film-remover, you can see the tonneau has some swirling, but it would definitely be an easy fix using 1500 wet, then a proper polish, working out to the edges, to get rid of the marks entirely:

P1010858.jpg


However I am just prepping for spray, so this is how I left it:

P1010857.jpg
Last edited by Jeemy on Wed 05.06.2013, 14:03, edited 1 time in total.
T: 0800 084 3084
M: 07391 295 146
User avatar
Jeemy
God
 
Posts: 1197
Joined: Tue 26.06.2012, 14:53
Location: East Lothian, Scotland

Re: Jeemy's Elan Rebuild

Postby Jeemy » Tue 04.06.2013, 22:44

As I will be putting the same hood back down, I took some time to look at the sealing strip:

P1010859.jpg


The first half came away with a lot of grit and grime, this is 1/4 of the detritus:

P1010860.jpg


And the second half even worse, again this is a quarter of what I removed. Part of the cleaning routine will definitely be to wipe that strip down, no wonder it abrades the paintwork:

P1010861.jpg


Working down the sides, you can see where the perished weatherstrips used to reach to, and the gathered crap that drips out of them:

P1010852.jpg


After a rinse down - not polished or touched with anything but water and sandpaper - the car looks a whole different being. You can see in the first photo there is no bloody paint left (the gash in the headlight cover); but the pinking and inconsistency is completely gone. Were it not for the fact the paint was obviously on its last legs, and I know it would pink again, had I gone at this with a 1500-2000 grit sandpaper, all that would have happened is that I'd never have gone through that spot on the headlight. The whole car is back to a uniform colour and this could have lasted another 2-5 years with some proper protectants:

P1010853.jpg

P1010854.jpg
T: 0800 084 3084
M: 07391 295 146
User avatar
Jeemy
God
 
Posts: 1197
Joined: Tue 26.06.2012, 14:53
Location: East Lothian, Scotland

Re: Jeemy's Elan Rebuild

Postby Jeemy » Wed 05.06.2013, 13:24

I should note one more problem as I use this thread as my reference for working back, after all that work with vacuum pipes, I have nice strong airflow through the vents - but only the demister vents!

The shutter control dial feels pretty loose in positions 2 and 3, positions 1 and 4 select with a strong click but its possible to completely bypass 2 & 3 with little force.

At the time I installed the heater I didn't have a running engine and therefore vacuum. So its going to be easy enough to test this and work out what the issue is and whether its fixable, at the same time as I test and set up the temperature control, which will be on final dash install.

But again if anybody has experienced this and knows what the issue might be that would be great. This time round I'll remove the fascia by disconnecting the harnesses and leaving the dials in place so I can reinstall it temporarily and run the systems in situ with visibility.
T: 0800 084 3084
M: 07391 295 146
User avatar
Jeemy
God
 
Posts: 1197
Joined: Tue 26.06.2012, 14:53
Location: East Lothian, Scotland

Re: Jeemy's Elan Rebuild

Postby hatters » Wed 05.06.2013, 14:26

You will have to find something to do with your time when all this is finished ?

Oh I have just thought what you can do, DRIVE it and Enjoy all your hard work, I think they call it Job Satisfaction
User avatar
hatters
Fanatic
 
Posts: 505
Joined: Wed 25.04.2007, 10:58
Location: Audley Staffordshire

Re: Jeemy's Elan Rebuild

Postby Jeemy » Wed 05.06.2013, 15:30

Lol I'm working 8 hours a day aside from this project, I am exhausted! I'll enjoy the free time. Part of the reason I am pushing so hard is that I reckon I'll maybe get 10-20 days driving her in good weather this year - and these are eroding fast if I don't hurry up.

While its away at the spray shop I was looking forward to a bit of a break……but I have a van to finish (respray wheels, fit side bars, reversing sensors and camera - then I can sell it) and a full cosmetic overhaul of my Audi - brakes, wheels, tyres, bodywork & "re-connolising" the leather before it goes for its stage 3 kit. These have been on hold way too long due to the weather - the Lotus was meant to be on the road mid this month!

It all depends how easy the suspension and brake replacement are. I suspect substantially easier than the removal of the turbo and engine 'rebuild' (not that I actually DID much!) - as the suspension is in constant movement it appears the bolts are far less subject to being unremovable. I am hoping a 2-day job for the first front wheel suspension & brakes; then a day once I know what I am doing for the second, and hopefully another day each for the back struts. There will be approx a 2-week wait for the seats etc so I'll actually have way more time than I need - hopefully I will be in receipt of the new hoses by then so things like that, the cam cover, the valves if they are still a problem, the solenoids for the boot, the stereo install, and the carpeting can all be fitted into those 2 weeks; meaning by the time the seats re-install, everything else will be done. Then wheels, tyres and balancing won't take long.

All of this is in the fervent hope that the judder exhibited sometimes on acceleration will come out with a wheel alignment. What can you do? I can't do that until I put the new wheels, suspension & tyres on, so it will have to be one of the last jobs to do. Its somewhat of a gamble.

So maybe 3 weeks? I think this is probably wishful thinking.
T: 0800 084 3084
M: 07391 295 146
User avatar
Jeemy
God
 
Posts: 1197
Joined: Tue 26.06.2012, 14:53
Location: East Lothian, Scotland

Re: Jeemy's Elan Rebuild

Postby Jeemy » Sat 08.06.2013, 19:54

Day 2 of painting prep and the old weatherstrips have to come out - I want to ensure every accessible bit of paint is covered, and this whole thing started with a leaking weatherstrip.

Not a pleasant job - I have my suspicions that my perfectly-operating windows won't be as good when its all over.

The interior weatherstrip came off nice and easily - I plan to just re-use the brushes as they are in pretty good nick and hard to replace as far as I gather:

P1010862.jpg


The exterior weatherstrip is the problem, and the hard part - some of the screws can come out easily with the window lowered:

P1010864.jpg


The access panel covers have these plastic rivets in them, apparently we have loads lying around I discovered later......pushing the centre plug through means they come out pretty easy:

P1010865.jpg


I tried to make my own removal tool gaffa-taping a philips screwhead to a star spanner!

P1010875.jpg


Which worked fine, but even trying to drop the window off the centre plug:

P1010876.jpg


...I couldn't access the final screws. So the window had to come out.....
T: 0800 084 3084
M: 07391 295 146
User avatar
Jeemy
God
 
Posts: 1197
Joined: Tue 26.06.2012, 14:53
Location: East Lothian, Scotland

Re: Jeemy's Elan Rebuild

Postby Jeemy » Sun 09.06.2013, 15:52

3 out of the 8 or so screws were totally rusted. I spent 2-3 hours on this, drilling them with plenty of water to keep bits lubricated and cool, and eventually ended up chiselling them off with a hammer and chisel I was that pissed off. I thought I was past this! (although I know that I have the rear arch liners still to fight with) - turns out that was the best approach I could have taken, because instead of splitting the heads out, I've torn the whole screw out and have a hole left to use again. I ordered one of the dew strip removers from Rodney Whomever for refitting but I still have the drivers door to do......

P1010877.jpg


Next (well, running subsequently) was the repair of the hood storage cover, and a test fit of the roll hoops. So once its sprayed I don't have any heavyweight work needing doing which might rub the paintwork somewhat.

I started by strapping up the roof with some soft, steel-reinforced straps, and appropriating a passing Irishman to aid me in the tonneau removal.

P1010866.jpg


Cover came out fairly easily, there are some repairs to perform and measurements to take on this seperately. You can see the two bolts out of 4 I removed on the plastic shell.

P1010867.jpg


Once I had the shell itself out I had a look at the 4 squares of gaffa tape. Without having had a detailed look at the harness, it looks like the alarm was here and is no longer.......hopefully I'll be able to work out how to trip the central locking from here.

P1010868.jpg


I also discovered some rust behind the B-posts - glad I did; although access at the other side below the fuel tank won't be easy I can get a hand down and push off any of the loose particles, and spray some ML down there. Its not that bad on this side and it has always seemed the drivers side has been the worst for all rust, I'm not too worried.

P1010870.jpg


I also removed the cover for the fuel pump, this needs replaced as part of the service schedule:

P1010871.jpg


The roll bars mount at the left and right inside these bars which appear to provide rigidity to the hood mounts. Its a VERY tight fit.........1mm too slim at the moment.

P1010872.jpg


..........so I had to loosen these retaining nuts and tap out the bars gently using a rubber mallet:

P1010869.jpg


Which allowed me to get them in place to work out where the bolt-holes go.

P1010873.jpg


It appears you have to drill a hole into the bars; the nearside one is right by the fuel fill pipe and hard to access; I marked it with a pen and drilled it at an angle slightly larger than needed, because the metal plate that sits outside will spread the load and locate the bolt. I put a wedge of wood with the metal plate behind it to protect the pipe:

P1010874.jpg
T: 0800 084 3084
M: 07391 295 146
User avatar
Jeemy
God
 
Posts: 1197
Joined: Tue 26.06.2012, 14:53
Location: East Lothian, Scotland

Re: Jeemy's Elan Rebuild

Postby Jeemy » Sun 09.06.2013, 16:21

Eventually I got it all drilled and in for a test fit, which seemed good. The back window clears it as does the hood guide bar, but to get this good fit with a flush fitting at the rear centre mounts, it ends up slightly angled on the side mounts.

I inserted the two bolts through the already-present holes and using the square profile tube supplied found that the tube fouls on the bolts at the bottom of the hood bracket supports on one side:

P1010880.jpg


And the hole is still not quite bit enough at the other; a slightly slimmer bolt will make it through but I'll need to work on this:

P1010881.jpg


The rear fitment is nice and flush, however, so I marked the drill holes out for that. I'll still get some 1/8" steel shims made while she's being sprayed just in case it needs it:

P1010882.jpg


I refitted the tonneau cover and left the hoops in place over the weekend. I'll give them a check when I am fresh on Monday, and the tonneau needs a quick repair. But this means once she is sprayed and they are powder-coated, I can just drop them in and tighten the bolts without having to do all this b*ggering about.

P1010883.jpg


Couple of final pics; firstly the Battery Brain I fitted and what I think is the alarm harness visible in the top right:

P1010884.jpg


And finally a query I have, I'll put it in the appropriate place. To get the window out I had to drill out two of the rivets holding on this metal strip; even after loosening the bolt holding on the rear runner track, it was just not enough play to get it past so I slightly bent this out the way:

P1010878.jpg


Is this a necessary step? Can you force the window past this strip without demolishing the fittings? I mean, I will work out how to put it back together but I don't know whether its best to try to bend & strain the fibreglass, or to drill out the rivets on the strip.......
T: 0800 084 3084
M: 07391 295 146
User avatar
Jeemy
God
 
Posts: 1197
Joined: Tue 26.06.2012, 14:53
Location: East Lothian, Scotland

Re: Jeemy's Elan Rebuild

Postby dapinky » Sun 09.06.2013, 16:30

Jamie,

Make sure you change the fuel filter BEFORE fitting the hoops - it's a lot easier than with the fitted!!!

Have a read of the wiki page for a couple of useful tips.
Dave

Just the one now, but this one's mine! - and it will be finished eventually..... - but also temporary custodian of a project until it is finished enough for Angie to drive it


...oh, and a 2006 Freelander destined for the jungles of The Gambia - 4500 miles across roads, desert and tracks - what could possibly go wrong?
User avatar
dapinky
LEC Administrator
 
Posts: 10625
Joined: Sun 15.10.2006, 12:54
Location: As far west as you can get in West Wales before you become Irish (Pembroke Dock).

Re: Jeemy's Elan Rebuild

Postby Jeemy » Sun 09.06.2013, 16:35

Will do mate, hoops aren't going finally in for a long time - I want to powdercoat them the same colour as the wheels but I cannot make a final decision on wheel colour until the brakes are in. The plan I have might be too much! Once I have brakes in and can photograph the paint job, I can play around in photoshop and decide whether I need to tone down or if I can be as flamboyant as it appears I want to!

Happily Martin was kind enough to send me the fitting instructions for the LGM hoops and it appears I followed them to a tee! Some top tips in there but I am pleased I worked it out.
Last edited by Jeemy on Wed 12.06.2013, 11:49, edited 1 time in total.
T: 0800 084 3084
M: 07391 295 146
User avatar
Jeemy
God
 
Posts: 1197
Joined: Tue 26.06.2012, 14:53
Location: East Lothian, Scotland

Re: Jeemy's Elan Rebuild

Postby epipete » Sun 09.06.2013, 16:37

IIRC just drill out the rivets and remove the strip, replace the strip & rivets later. This will save you a lot of hassle and for the sake of half a dozen rivets and 10 minutes reaffixing why not?
You know more than you think you know, just as you know less than you want to know. ... Oscar Wilde
User avatar
epipete
God
 
Posts: 2416
Joined: Wed 17.08.2011, 11:03
Location: Chippenham

PreviousNext

Return to Projects - Car (Major)

Who is online

Users browsing this forum: No registered users and 3 guests